Environments
Configure deployment targets for your Processes set Module parameters, manage URLs, and control runtime behavior.
An Environment is a deployment target with its own configuration. Each Environment holds the Module settings (API keys, connection strings, voice profiles, etc.) that your Process needs at runtime. By linking a Process to multiple Environments you can maintain separate configurations for testing and production.
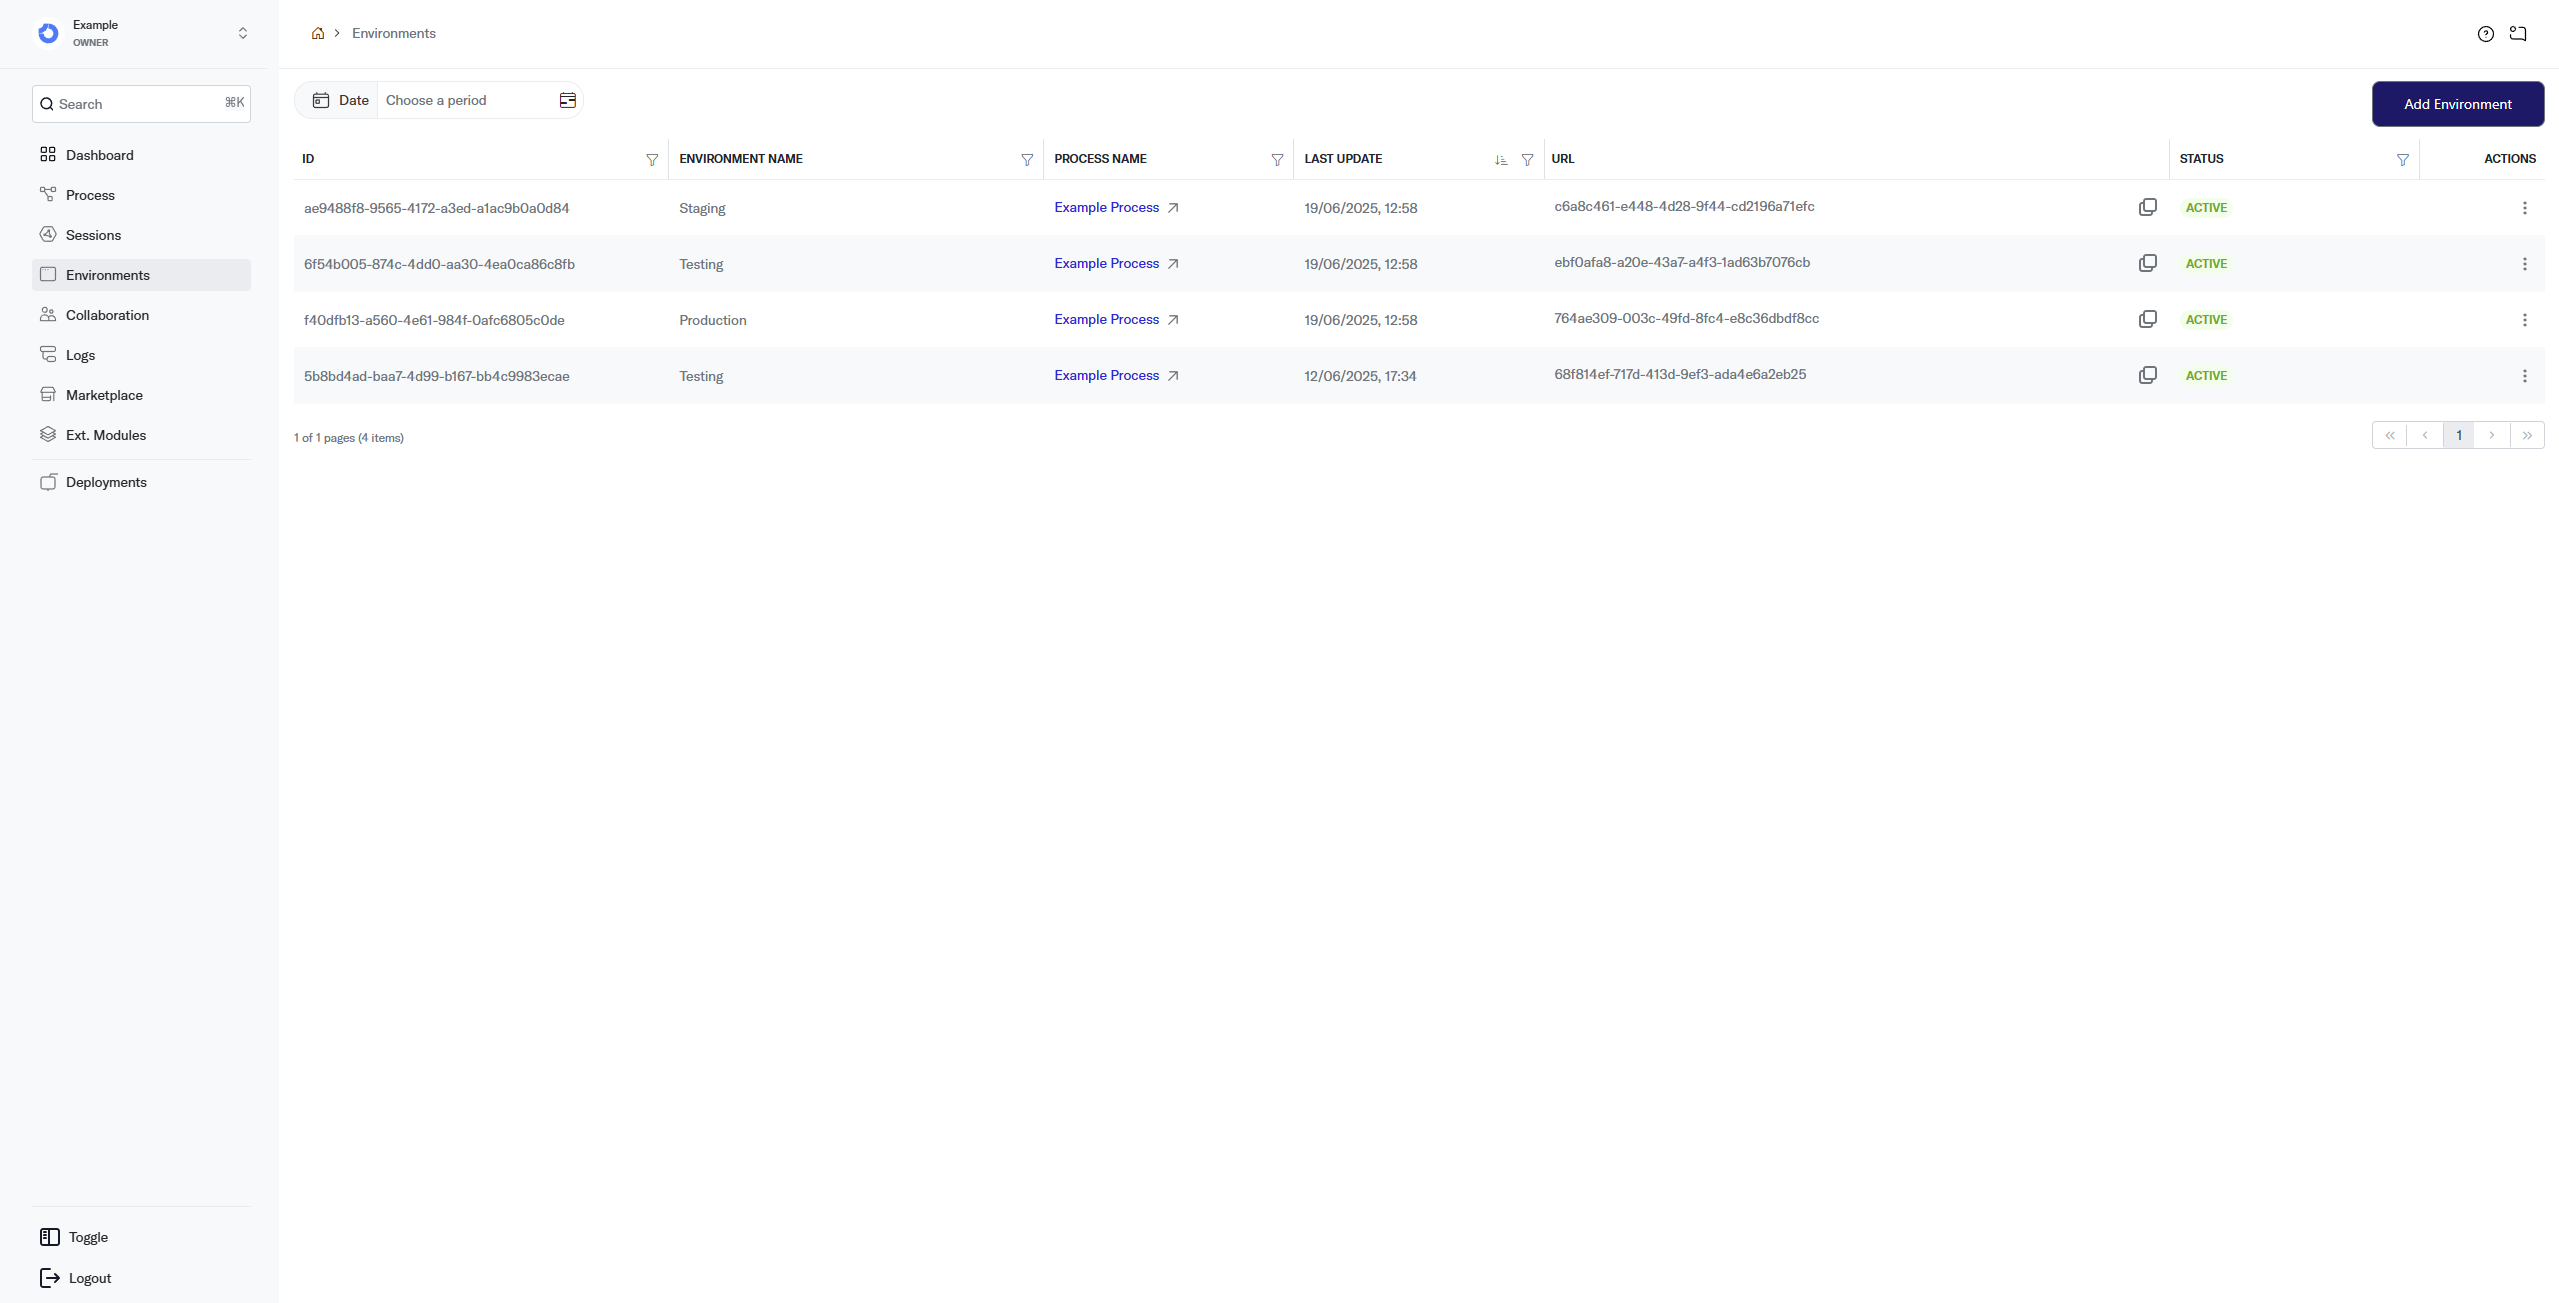
How it works
When you deploy a Process, the engine reads the configuration from the target Environment to initialize each Module. Environments are scoped to a single Process and identified by a unique URL that external systems use to trigger Sessions.
If you enable the Testing Environment option when creating a Process, that Environment is created with a test flag: every Session generated from it is marked as test data. The flag is set only through that creation option renaming an Environment, or adding one later, does not make it a test Environment.
Fields
- Id unique identifier of the Environment. Useful when contacting support.
- Environment Name the name you gave the Environment. Names must be unique within the Workspace.
- Process Name the Process linked to this Environment.
- Last Update date and time of the most recent configuration change.
- URL the callback URL that external systems use to trigger the linked Process.
- Status whether the Environment is active or disabled.
- Actions menu to perform operations on the Environment.
Actions
Add
Environments are created together with a Process, and you can add more at any time from the editor.
- Open the Process in the BPMN editor.
- Open the Environments panel.
- Click the + (Add environment) button.
- Enter a unique name (e.g.
Staging) and click Add.
The number of Environments per Process depends on your Service Plan.
Edit
Update the Environment Name or toggle its Status.
- Click the Actions menu on the Environment row.
- Select Edit.
- Modify the fields you need.
- Click the Actions menu again and select Save to confirm.
Delete
Permanently remove an Environment from the Workspace. A confirmation dialog appears before deletion.
A deleted Environment can only be recovered by contacting customer support.
Environment Details
The detail view lets you configure every Module installed in the linked Process.
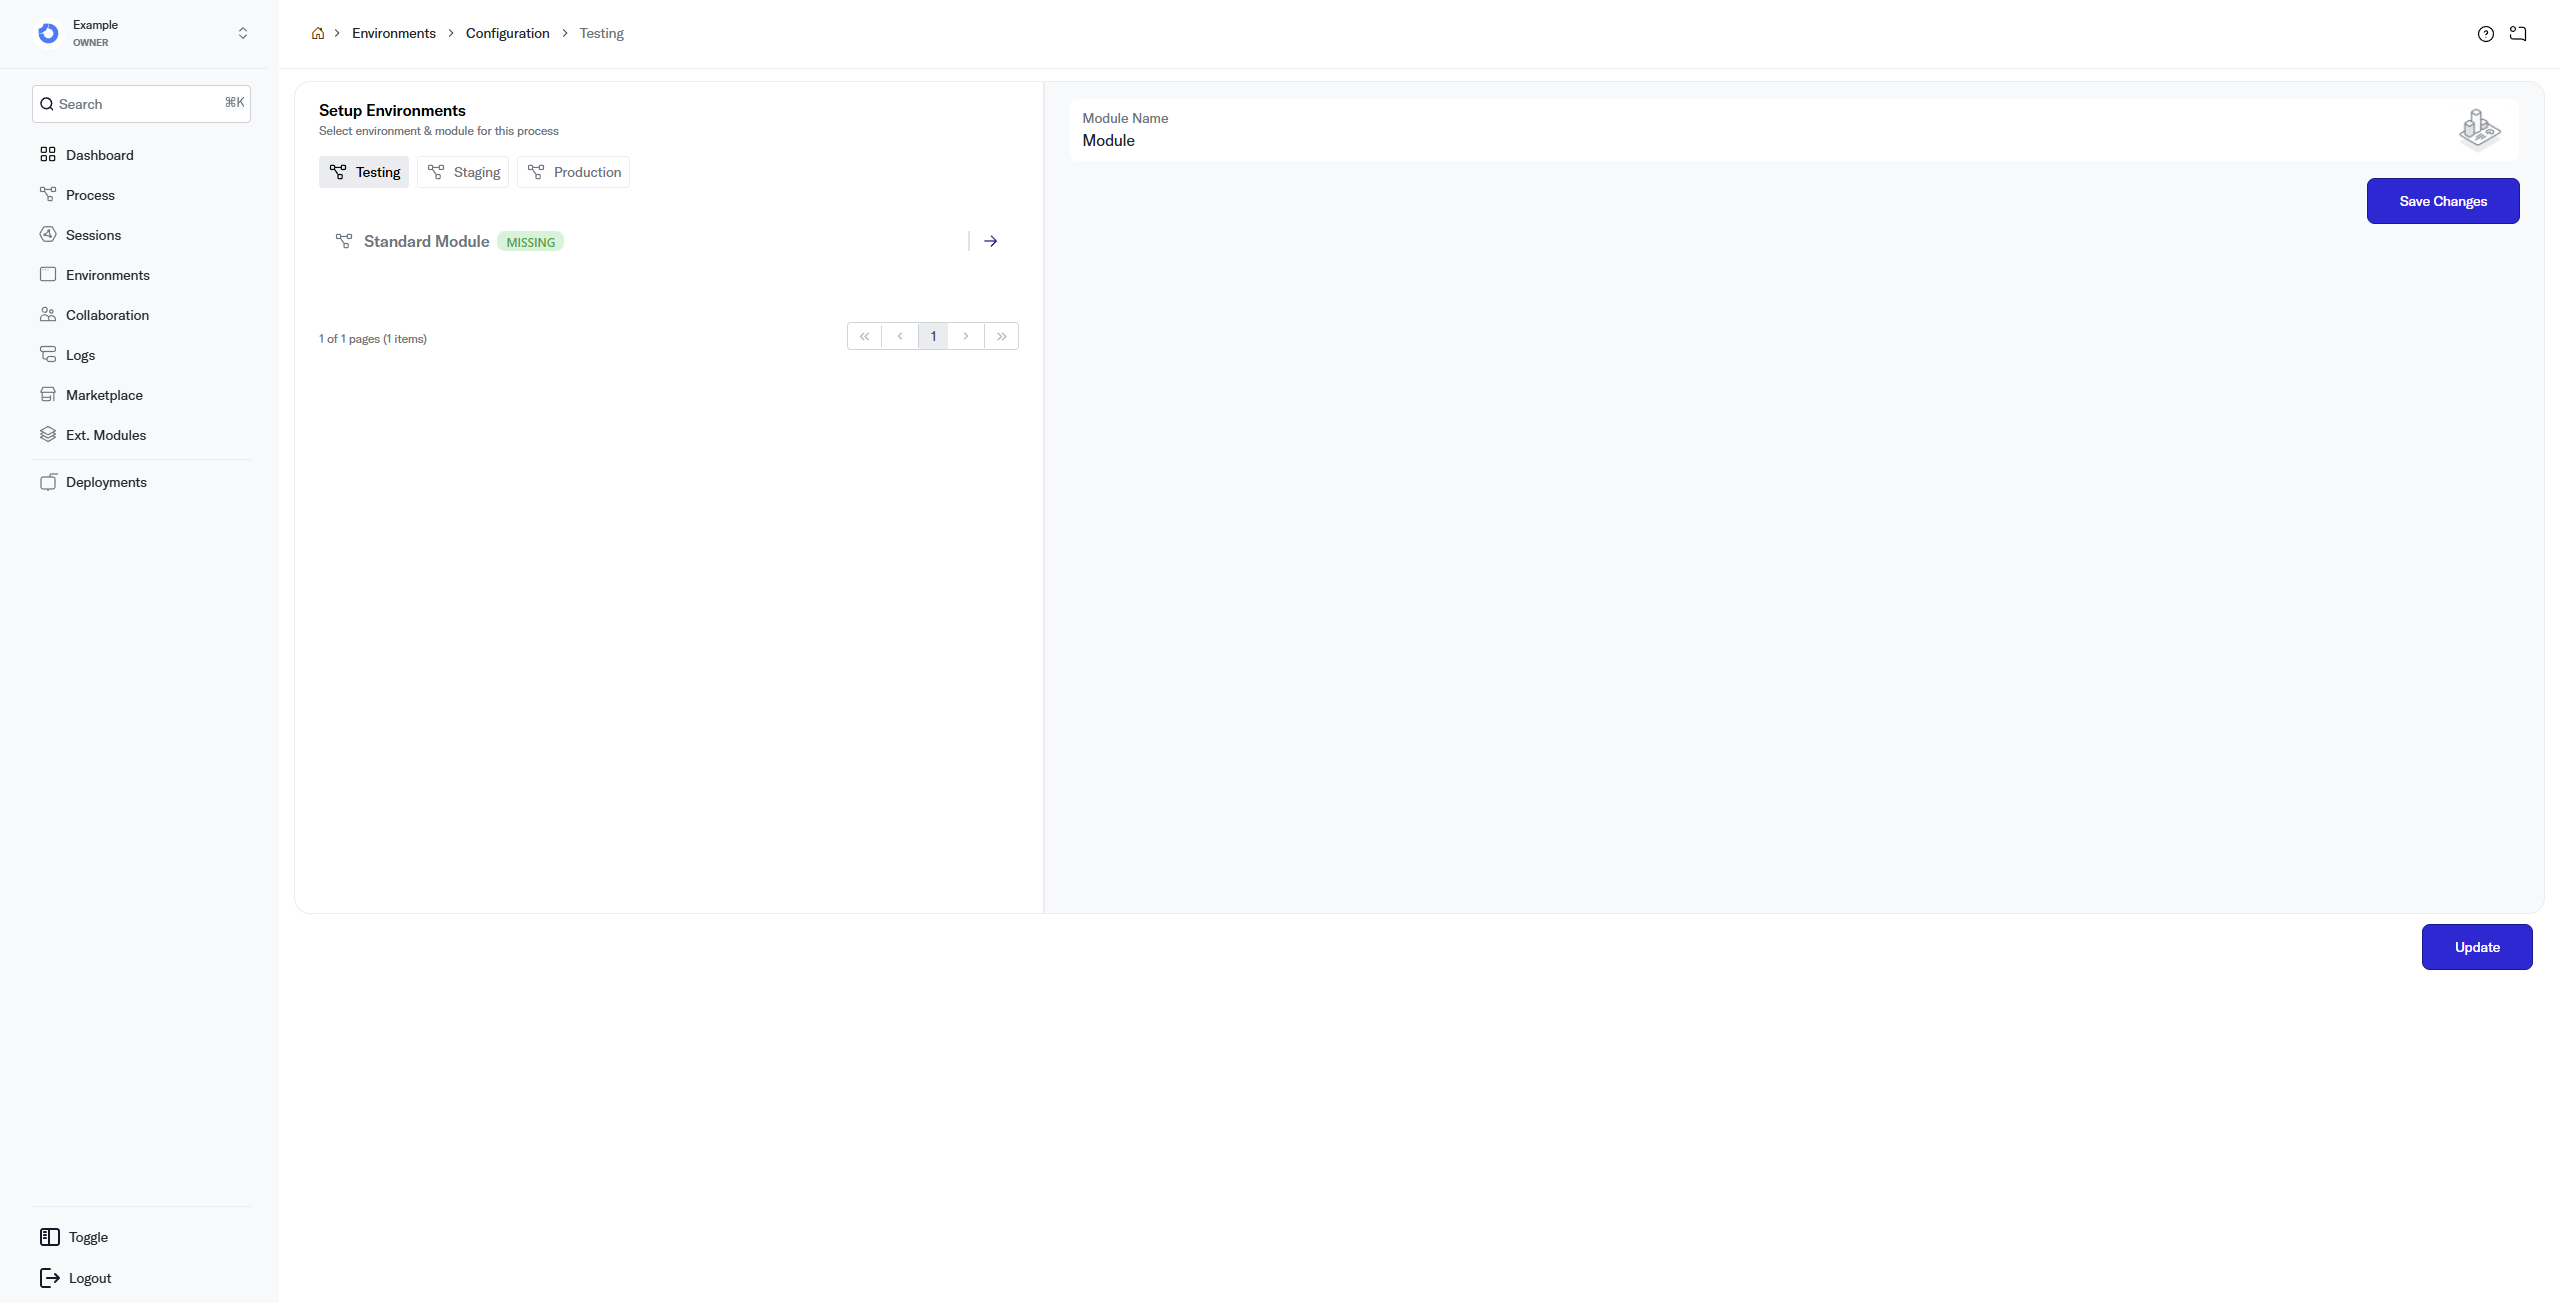
Each installed Module appears as a collapsible section. Fill in the required fields for each Module and click Update to save. If the Process has multiple Environments, switch between them using the tab bar at the top.
The tag missing next to a Module name means its configuration is incomplete. The tag disappears once you save valid configuration values.
The Environment URL displayed on this page is the endpoint you provide to external systems (chat widgets, telephony providers, Slack apps) to connect them to your Process.
Best practices
- Keep test and production Environments separate use a "Testing" Environment to validate changes before deploying to production.
- Double-check API keys after rotation when you rotate an external API key, update every Environment that uses it.
Related pages
- Process manage the Process linked to this Environment.
- Marketplace install Modules that require Environment configuration.
- Error Codes resolve Environment-related errors.